Tuesday, October 31, 2017

Building a Responsive Grid System Using CSS: Part 4

Recap

In the last post, we started working on the grid system after we understood the idea behind it. The work that we did so far is only for two selectors, the row and the container. Now that we have the container and the row setup, we can start working on the columns. Note that we might need to add more rules for the row and container later.

Working on The Columns Selectors

The first thing that we have to specify is the padding within each column. To do that, we have to add new selector as follows:

CSS Code

1 2 3 4 5
[class*='col'] {
    padding:0.5%;
}

The selector [class*=”a_sub_string”] is used to apply rules to a set of class selectors with the name of the class containing the string “a_sub_string”. When we add this rule, each column will have 0.5% padding. After specifying the padding, we will apply a coloring to all the columns to make them visible.

CSS Code

1 2 3 4 5 5
[class*='col'] {
    padding:0.5%;
    background-color: #b3ffb3;
}

Now, let’s modify our HTML document to include two columns in the body. Both columns will have the same width. Since we divide the row into two columns, each one will take 50% of the total row width. This means we will use the ‘col-6’ class selector that we wrote in part 3.

HTML Code

1 2 3 4 5 6 7 8 9 10 11 12 13 14 15 16 17 18 19 20 21 22 23 24 25 26 27
<html>
    <head>
        <title>Page Title</title>
        <meta charset="UTF-8">
        <!--The CSS file that will contain the grid system-->
        <link href="grid-system.css" rel="stylesheet">
    </head>
    <body>
        <div class="container">
            <!--Page Header-->
            <div class="row">
                Header
            </div>
            <!--Page Body-->
            <div class="row">
                <!--col-1 will have the minimum width-->
                <!--col-12 will have the maximum width-->
                <div class="col-6">Column 1</div>
                <div class="col-6">Column 2</div>
            </div>
            <!--Page Footer-->
            <div class="row">
                Footer
            </div>
        </div>
    </body>
</html>

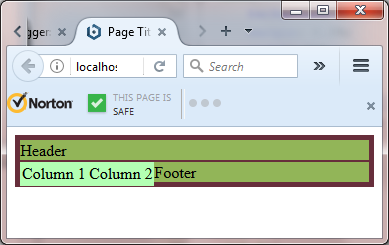
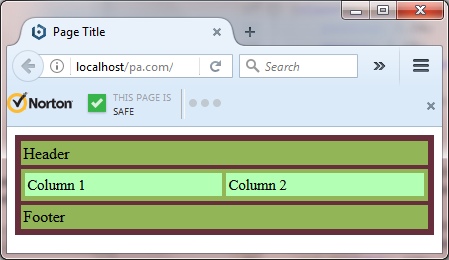
Before we continue with how to specify the width of each column in the grid, let’s see the result of our work till now.

Hmm…, something is not correct. The first problem is that each column is in top of the other like a row. The other problem is that the body row has disappeared. To make the column act as a column, we have to specify the value of a property called ‘float’. This property is used to specify where to place the element in its parent container. Depending on the language the website uses, the column might float left or right. Since English language is left to right, we will make the columns float left.

CSS Code

1 2 3 4 5 6 7
[class*='col'] {
    padding:0.5%;
    background-color: #b3ffb3;
    float:left;
}

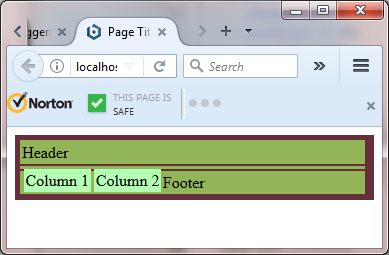
After setting the value of this property, the HTML document will look like this:

Well, the columns ‘look like’ columns but we still have other issues. As we can see, the columns are connected with each other and the body row is still not visible. Also the footer is in the same place as the columns. In order to separate the columns, we have to specify the margin for each column, and in order to make the row visible, we have to set the property padding of the row. Let’s set the row padding to 0.5% and the margin of the columns to 0.5%.

CSS Code

1 2 3 4 5 6 7 8 9 10 11 12 13 14 15
.row{
    background-color: #92B558;
    padding:0.5%;
    margin:0.5%;
    width:98%;
}

[class*='col'] {
    padding:0.5%;
    margin:0.5%;
    background-color: #b3ffb3;
    float:left;
}

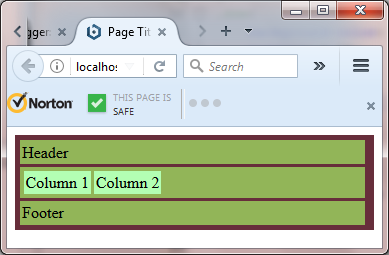
After adding the given properties to our CSS file, the HTML document should be look like this in the browser:

We have got new problems but fixed the previous ones. The first one is that the columns are outside the row and the second one is the columns have incorrect widths. To fix the first issue we need to set the value for the property “float” for the row and the container. We make both float to the left. Once we do that, the columns will fit within the row.

The final step before we test what we did is to specify the width of each column in the grid. As we have said before, the grid that we will be building will have 12 columns. Assuming that the total available width is 100%, each column will have a width of 100/12 = 8.333333333% which is the minimum possible width which will be col-1 width. The next column (which is col-2) will have width of col-1 + 8.333333333%. The idea is to increase the width by 8.3333333333% each time we move to the next column.

CSS Code

1 2 3 4 5 6 7 8 9 10 11 12 13 14 15 16 17 18 19 20 21 22 23 24 25 26 27 28 29 30 31 32 33 34 35 36 37 38 39
.col-1{
    width:8.333333333%;
}
.col-2{
    width:16.66666667%;
}
.col-3{
    width:25%;
}
.col-4{
    width:33.33333333%;
}
.col-5{
    width:41.66666667%;
}
.col-6{
    width:50%;
}
.col-7{
    width:58.33333333%;
}
.col-8{
    width:66.66666666%;
}
.col-9{
    width:75%;
}
.col-10{
    width:83.33333333%;
}
.col-11{
    width:91.66666666%;
}
.col-12{
    width:100%;
}

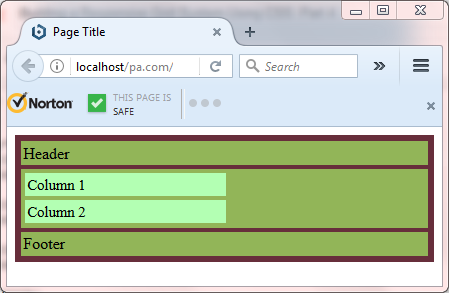
When we test the result in the web browser, we will see a problem as follows:

As we can see, the second column has moved down. The issue we have here is related to margin of each column. Remember that the margin of the columns is set to 0.5%. This means that 1% of the total width has been used for the margin. In order to fix this problem, we subtract 1% from the width of each column to add space for the margin. So, the correct width of each column will be as follows:

CSS Code

1 2 3 4 5 6 7 8 9 10 11 12 13 14 15 16 17 18 19 20 21 22 23 24 25 26 27 28 29 30 31 32 33 34 35 36 37 38 39 40 41 42 43 44 45 46 47 48

.col-1{
    width:7.333333333%;
}

.col-2{
    width:15.66666667%;
}

.col-3{
    width:24%;
}

.col-4{
    width:32.33333333%;
}

.col-5{
    width:40.66666667%;
}

.col-6{
    width:49%;
}

.col-7{
    width:57.33333333%;
}

.col-8{
    width:65.66666666%;
}

.col-9{
    width:74%;
}

.col-10{
    width:82.33333333%;
}

.col-11{
    width:90.66666666%;
}

.col-12{
    width:99%;
}

Once we update the width of the columns, the two columns will fit within the body row.

To make sure that what we did so far is 100% correct, we will be creating multiple rows within the body and add columns inside each row. Note that it is possible to add columns inside rows and rows inside columns (sub-dividing).

HTML Code

1 2 3 4 5 6 7 8 9 10 11 12 13 14 15 16 17 18 19 20 21 22 23 24 25 26 27 28 29 30 31 32 33 34 35 36 37 38 39 40 41 42 43 44 45 46 47 48 49 20 51 52 53 54 55 56 57 58 59
<html>
    <head>
        <title>Page Title</title>
        <meta charset="UTF-8">
        <!--The CSS file that will contain the grid system-->
        <link href="grid-system.css" rel="stylesheet">
    </head>
    <body>
        <div class="container">
            <!--Page Header-->
            <div class="row">
                Header
            </div>
            <!--Page Body-->
            <div class="row">
                <div class="row">
                    <div class="col-12">100%</div>
                </div>                 <div class="row" >                     <div class="col-6">50%</div>                     <div class="col-6">50%</div>                 </div>                 <div class="row" >                     <div class="col-3">25%</div>                     <div class="col-3">25%</div>                     <div class="col-3">25%</div>                     <div class="col-3">25%</div>                 </div>                 <div class="row" >                     <div class="col-1">8.33%</div>                     <div class="col-1">8.33%</div>                     <div class="col-1">8.33%</div>                     <div class="col-3">25%</div>                     <div class="col-3">25%</div>                     <div class="col-3">25%</div>                 </div>                 <div class="row" >                     <div class="col-11">90%</div>                     <div class="col-1">10%</div>                 </div>             </div>             <!--Page Footer-->             <div class="row">                 Footer             </div>         </div>     </body> </html>

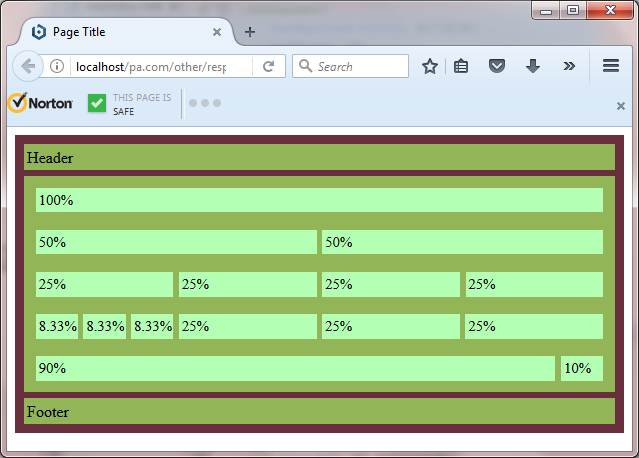
The result of the given HTML code will be like the next image if we view it in FireFox web browser for desktop.

What we just did is a fixed grid system. If we would build a website using the given grid, it will look 100% perfect in a big screen. In the next post, we will make the grid fluid (or responsive).

The full CSS Code that we wrote thus far can be downloaded from here.

Tuesday, October 24, 2017

CSS Syntax Highlighter and Formatter

Introduction

This week, instead of working on new part of my series in how to create a responsive grid system in CSS, I have decided to do other thing. What I did is I created a tool that can be used to create a nicely formatted CSS code snippets that can be added to any website.

The Idea Behind The Tool

If you was following with me for the last few weeks, you will for sure know that I was writing blog posts about how to build a responsive grid system using CSS. One issue that I had is writing CSS code snippets in my posts. What I used to do is to write the CSS code and format it manually which takes a lot of effort and time.

After realizing that, I decided to create a tool that I can use to create the code snippets automatically. By doing that, I will save a lot of time and effort. After working on the tool for the last two weeks, the tool is ready for public use and available in my official website, Programming Academia Under the name CSS Syntax Highlighter and Formatter.

Using The Tool

In order to insert the code snippet in your web site, there are only 4 steps to do:

Including CSS File

The first step is to include the following <link> tag inside the <head> tag.

Code

1 2 3

<link rel="stylesheet" href="https://www.programmingacademia.com/res/css/code-theme.css">

This CSS file is basically the theme that will be applied to the different keywords within your CSS code. Also it contains some formatting parameters to make the code snippet looks good in big and small screens.

Copying and Pasting Your CSS Code

In this step, All what you need to do is to copy your CSS code and past it within the tool. Suppose that we have the following CSS code that we would like to add to our blog:

/*For mobile*/
@media screen and (max-width:760px){.col{width:100%}}
/*For Big Screens*/
.col-1{width:50%}
.col-2{width:100%}

As we can see, the code is kinda messy and not beautiful to add in a web page. Simply we copy it and past it in the tool.

CSS Highlighter

Past your CSS code in the shown area.

Click 'Highlight'

Once you click the button that is labeled as 'Highlight', you will get two things, The first thing is an editable HTML code that you can copy and past in your web page and secondly, A preview of how the code snippet will look like.

The Generated Code Snippet as HTML with Preview.

Copying The Generated HTML Code

The last and final step is to copy the generated HTML code and past it in the web page that you would like to show the code snippet in. Also it is possible to edit the code if you would like to add or remove extra stuff.

And this is how you can use this simple tool. Please give me your opinion about it and provide me with your feedback. Also I will be more than happy if you share it with your friends and any one in need for such as tool 😄.

Monday, October 16, 2017

Building a Responsive Grid System Using CSS: Part 3

In the last post, we discussed the basic idea behind grid system. Also we talked about the concept of CSS at-rules and we have said that we will be using the '@media' rule to make the grid system responsive. In this post, we will start by building the grid system.

One thing to keep in mind that in all the rules that we will be creating, we will use percentage for content width, padding and margins. The grid system that we will create will have 12 columns. This means that the smallest column width will be 100/12 = 8.33% and the maximum will be 100%. The given values will change later when we apply margins to the columns and rows.

Creating Required Selectors

Our grid system will have the following components:
  • A Container
  • A Row
  • 12 columns
This means we have to define 14 main class selectors. In addition to the 14 selectors, we will include the one that we have used to change the property “box-sizing” of All HTML elements from part 1 of the series.

CSS Code

1 2 3 4 5 6 7 8 9 10 11 12 13 14 15 16 17 18 19 20 21 22 23 24 25 26 27 28 29 30 31 32 33 34

*, *::before,*::after{
    box-sizing:border-box;
}

.container{}

.row{}

.col-1{}

.col-2{}

.col-3{}

.col-4{}

.col-5{}

.col-6{}

.col-7{}

.col-8{}

.col-9{}

.col-10{}

.col-11{}

.col-12{}

Creating Test HTML Page

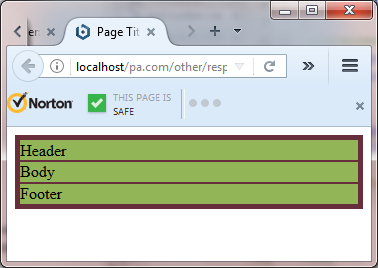
Now we have the needed selectors, we will start writing the needed rules inside each one. But before we do that, let’s create HTML document that we will be testing our grid system in. The page will have 3 sections, header, footer and a body. Each component of the 3 will be represented as a row within a container similar to the next image.


The HTML code for the given layout can be found below.

HTML Code

1 2 3 4 5 6 7 8 9 10 11 12 13 14 15 16 17 18 19 20 21 22 23 24 25 26 27
<html>
    <head>
        <title>Page Title</title>
        <meta charset="UTF-8">
        <!--The CSS file that will contain the grid system-->
        <link href="grid-system.css" rel="stylesheet">
    </head>
    <body>
        <div class="container">
            <!--Page Header-->
            <div class="row">
                Header
            </div>
            <!--Page Body-->
            <div class="row">
                Body
            </div>
            <!--Page Footer-->
            <div class="row">
                Footer
            </div>
        </div>
    </body>
</html>

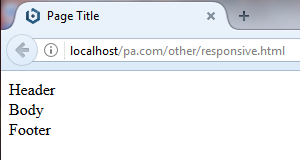
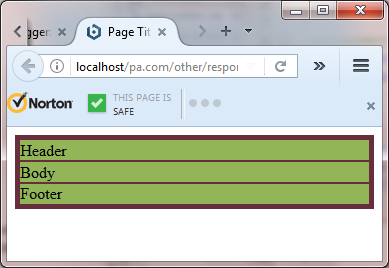
One thing we have included is the CSS file that we will be writing the code for the grid system in. In our case, we have given it the name "grid-system.css". When we view the given HTML document in a web browser, we will see the following:


Inside the header row, we will have other components such as search bar, breadcrumb and page title. The page body row will contain the content that the user will be interested in viewing. The footer usually contains links to pages such as “About” and “Terms of Service”.


Working With the Row and Container Selectors

As we have seen, When we view the test document in web browser we will see a blank page with only the text we have added. To make the container and row visible, we will add colors to them using CSS.

CSS Code

1 2 3 4 5 6 7 8

.container{
    background-color: #672E3B;
}

.row{
    background-color: #92B558;
}

After setting background colors, the only thing that we will see is the color of rows. The reason for that is the container will be behind the rows. To see the container, we have to specify the value of padding property within the container. Let’s set it to 1%.

CSS Code

1 2 3 4 5

.container{
    background-color: #672E3B;
    padding:1%;
}
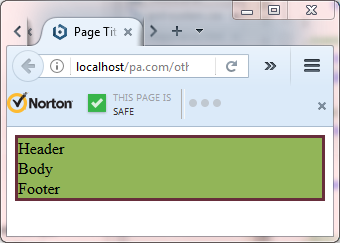
When we apply the given CSS rules, we will be able to see the rows and the container.


One issue we can notice is that the rows look like as if they were connected. To fix that, we have to specify the value of the property margin for the row. Let’s make the margin 0.5%.

CSS Code

1 2 3 4 5

.row{
    background-color: #92B558;
    margin:0.5%;
}
Once we do that, the rows will be separated from each other.


When we look at the whole web page in the browser window, we can see that the page will fit without any issues. Even if we resize the whole window, we can see that the page will fit. If everything is fine, why do we have to bother our self with creating grid system? Well, a simple answer to that question is we will not see the difference unless we have many other elements in the page such as images, menus, search boxes and others. In the given page, we have only text which cannot affect the layout of the page that much. Also when we try the page on a smartphone, we might notice a difference.

Now let’s continue the work on our grid system. After specifying the padding, we will specify the width of the rows and container. We will set it to 100%.

CSS Code

1 2 3 4 5 6 7 8 9 10 11 12

.container{
    background-color: #672E3B;
    padding:1%;
    width:100%;
}

.row{
    background-color: #92B558;
    margin:0.5%;
    width:100%;
}

When we view the page in the web browser, we can notice something. The rows are off the container by some pixel.


Fixing that issue is simple. As we remember, the total width of an element is 100% including the content, border, padding and margin. Since the property “box-sizing” is set to “border-box”, the total width of each row will be 100% + margin = 100% + 1% = 101% which is greater than the container size (100%). To fix that, we reduce the width property of the row to 99% to add place for the margin. The correct width should be 99%. Keep this rule in mind, the total width of an element = 2*margin + width property value if the "box-sizing" property is set to "border-box". The 2 is to consider the margin on the left side and the right side. Since the container has no margin, we don’t have to change its width.

CSS Code

1 2 3 4 5 6 7 8 9 10 11 12

.container{
    background-color: #672E3B;
    padding:1%;
    width:100%;
}

.row{
    background-color: #92B558;
    margin:0.5%;
    width:99%;
}
Once we set the width of the row to 99%, every thing will look good as it should be.


This is the end of this part. In the next post, we will be working with the columns. Once we finish that, our rigid grid system will be fully ready for use in big screens.

Monday, October 9, 2017

Building a Responsive Grid System Using CSS: Part 2

Hello everyone. This is the second part on the series that will teach you how to build a responsive grid system for your website using CSS. In the previous post, we discussed the reasons that could lead to building a grid system. Also we reviewed some basic concepts related to CSS Box Model. In this post, we will be discussing the basic idea behind grid system. Also we will be talking about new concept in CSS which is the At-Rule

The Idea behind Grid System

For sure you know the meaning of the word ‘grid’. It is basically a set of intersecting vertical and horizontal lines. It is used to divide the page into rows and columns. Same idea applies in web development. We use CSS to divide the page into rows and columns. In web development, there are two types of grid systems, one is called ‘fixed’ and the other is ‘fluid’. The fixed does not change the width and height regardless of screen size. On the other hand, the fluid will adapt to different screen sizes. What we will be doing is to build a fluid grid system (Known as responsive grid). In order to build a fluid grid, we will have to use percentage to specify the content width and margins.

Web Page Grid System

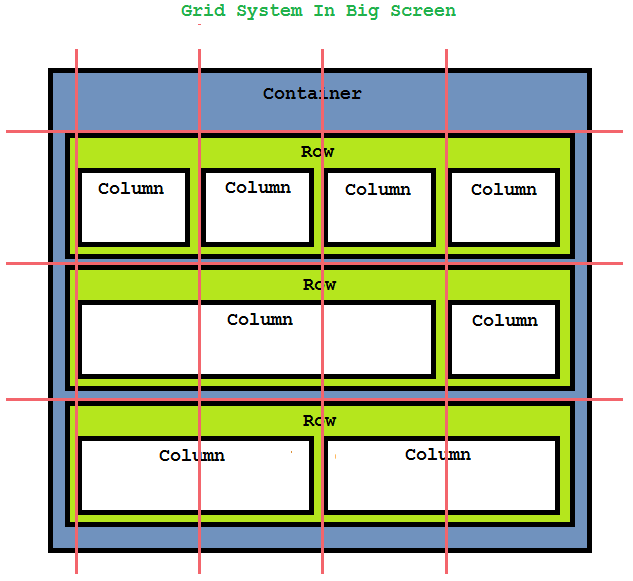
As we have said before, the first step in building the responsive grid system is to divide the page into rows and columns. To illustrate this, let’s take a look at the next picture.

In the given picture, we have something called ‘container’. We can think of it as a simple ‘div’ element. Inside the container, we have a grid system that consists of 3 rows. Each row has 4 columns at most and 2 columns at least. If we would use percentage to represent the width of each column in the first row, each column will take 25% of the row width. In the second row, one column will take 75% of the width and the other one 25%. In the last row, each column will take 50% of the row width. We can notice that in each case, the percentage will sum up to 100% for each row. Similar to the container, we can think of each row and column as a ‘div’ element

If we would implement the given grid system in CSS, It will be as it is in all screens, 4 columns in the first row, 2 columns in the second and last column if it is fixed. But what if we would like from the grid to display well in small screens? The idea is simple. We have to make the width of the columns to adopt to different screen sizes. We have to think about large, medium and small screens. To do that, we have to learn about new concept called CSS At-rule.

CSS At-Rules

An At-rule is simply a CSS statement that starts with the character '@'. There are two types of At-rules, conditional (or nested) at-rules and non-conditional at-rules. The non-conditional at-rules end with a semi-colon. One example of such as rule is the '@charset' rule. The conditional at-rules will include a block of CSS statments that will only apply to HTML document if the condition is true. An example of such at-rule is the '@media' rule. The '@media' rule is one of the most important at-rules as it is used to check the size of the screen that the website is displayed on. We will learn later how to use it to make our grid system responsive.

CSS Code

1 2 3 4 5 6

@charset 'UTF-8';
/* The @charset rule must be the first thing appear in css file. */

In the next post, we will start by building a fixed grid system. Later on, we will use the @media rule to make the grid system responsive.

Monday, October 2, 2017

Building a Responsive Grid System Using CSS: Part 1

Starting today, I will be posting a series of posts in which I will be teaching how to build a responsive grid system from scratch using CSS. Every week, I will try to add one post. This is the first post and we will be reviewing some basic concepts related to CSS.

Introduction

In these days, many people are browsing the web using many other devices other than personal computers and laptops. For that reason, one factor to consider while developing a website is to make it adaptive to different screen sizes. One way would be to create variants of the website for each device which is not good idea. The best option is to go with creating a responsive grid system for the website. Once you have the grid ready, you can use it to build the UI of the web site.

Before we continue with the process of building the grid system, you must have the basic knowledge of the following topics:

  • HTML Basics.
  • CSS Basics.
  • Using Web Browser Inspector (optional but very helpful).

Review: Box Model

Before we start building the grid system, let’s review some basic concepts that we need. The one and most important concept is the “Box Model”. The idea of box model is that HTML elements are represented as a rectangle. The rectangle has 5 important properties. The 5 properties are used to specify the Real width and height of HTML element. The 5 properties are:

  • Width
  • Height
  • Border
  • Margin
  • Padding

The width and height properties are used to specify the width and height of the content area within the HTML element. The border is simply a visible line that is used to show the shape of HTML element. The margin is used to specify how far the given HTML element from the other elements. The padding is used to specify how far the content area of HTML element from the border.

The border, the margin and padding are represented as boxes that surround the content area as illustrated by the next image.

By default, web browsers use only the content area width and height to compute the total width and height of HTML element. Basically this means that width property of HTML element = content width. This means that if we add a border of size 2px and a padding of size 5px to an element with width property = 100px, the total visible width will be 114px. We can see that in the next example.

HTML Code

1 2 3 4 5 6 7 8 9 10 11 12 13 14 15 16 17 18 19 20 21 22 23 24 25 26 27 28 29 30 31 32 33 34 35 36
<html>
    <head>
        <title>TODO supply a title</title>
        <meta charset="UTF-8">
        <style type="text/css">
            .div1{
                border: 2px black solid;
                background-color: #2d8659;
                width: 200px
            }
            .childDiv1{
                border: 2px black solid;
                background-color: #99e6e6;
                width: 100px;
                padding: 5px
            }
            .childDiv2{
                border: 2px black solid;
                background-color: #EEEEFF;
                width: 100px;
                padding: 5px
            }
        </style>
    </head>
    <body>
        <div class="div1">
            <div class="childDiv1">
                Child Div1
            </div>
            <div class="childDiv1">
                Child Div2
            </div>
        </div>
    </body>
</html>

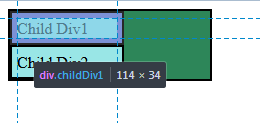
What we have in here is one DIV element with two DIV elements inside it. What we care about is the width of the inner two DIV elements. The “width” property is set to 100px. The border property is set to 2px and the padding is set to 5px. When we use the inspector of a web browser, we can see that the total element width is 114px.

This behavior can be overridden by specifying the value of the CSS property “box-sizing”. This property is used to tell the web browser how to calculate the width and height of HTML element. The default value for this property is “content-box” which means that the value of “width” property will be the width of content area. Another possible value for this property is “border-box”. If the value of the “box-sizing” property is set to “border-box”, the value of the property width will be content width + border + padding. For example, if we set the width property to be 100px with a border of size 2px and a padding of 5px, the total element width will be 100px. 10 of the 100 will be for the padding and 4 will be for the border and 86px for the content.

Let’s modify the code above and change the value of the property “box-sizing” and set it to “border box” and observe the effect.

HTML Code

1 2 3 4 5 6 7 8 9 10 11 12 13 14 15 16 17 18 19 20 21 22 23 24 25 26 27 28 29 30 31 32 33 34 35 36 37 38 39 40 41 42 43 44 45 46
<html>
    <head>
        <title>TODO supply a title</title>
        <meta charset="UTF-8">
        <style type="text/css">
            
            /*This selector is used to 
             *selects all HTML elements
             */

            *{
                box-sizing: border-box;
            }
            .div1{
                border: 2px black solid;
                background-color: #2d8659;
                width: 200px
            }
            .childDiv1{
                border: 2px black solid;
                background-color: #99e6e6;
                width: 100px;
                padding: 5px
            }
            .childDiv2{
                border: 2px black solid;
                background-color: #EEEEFF;
                width: 100px;
                padding: 5px
            }
        </style>
    </head>
    <body>
        <div class="div1">
            <div class="childDiv1">
                Child Div1
            </div>
            <div class="childDiv1">
                Child Div2
            </div>
        </div>
    </body>
</html>

As we can see, the width of the element is the same as we set even when we have border and padding. This will be useful as we build our grid system later. For that reason, we will set the “box-sizing” for all elements to “border-box” including pseudo -elements. To do that, we use the following CSS ruleset:

CSS Code

1 2 3 4 5

*, *::before,*::after{
    box-sizing:border-box;
}

Just a reminder, pseudo-elements uses double semi-colon and pseudo-classes uses single semi-colon. Next, we will start by understanding the idea behind the grid system.

One thing to note is that we did not talk about the margin. One thing to mention about the margin is that it will be added up to the element total width regardless of the property "box-sizing".

In the next post, we will be learning about the basic idea behind grids and we will be interdicting a new concept which is the CSS At-Rule.